Chris Heider from Handy Dad TV has always been a supporter of carpet in the house; however, he recently found an ultra-clean, fast and easy alternative for the concrete floor in their family room in Lifeproof Vinyl Plank Flooring. Read the post to find out how Chris completely transformed his family room in a few easy steps.
DIY Vinyl Plank Flooring Install

Materials
- LifeProof Shadow Hickory 7.1 in. x 47.6 in. Luxury Vinyl Plank Flooring
- Roberts Pro Pull Bar for Laminate and Wood Floors
- Roberts 2.75 in. x 9.25 in. x 0.50 in. Black Universal Tapping Block
Family Room Remodel Inspiration
Dogs are like family. You can’t live with them, can’t live without them. Don’t get me wrong, I love dogs. I’ve had dogs all my life. But just as cats can be hard on furniture, dogs can be hard on floors.
I have always been a carpet lover and love the way it feels warm between my toes and softly catches falling objects. I love the way it dampens footsteps on my squeaky floors and makes dog paws barely imperceptible. But the quest for ultra clean, allergen-free homes has made broadloom carpeting passe.
In the 20 years I’ve lived in this house, I’ve replaced the family room carpeting three times. The primary causes of carpet wear and stains in the early years were kids and red Kool-Aid. Lately, it’s more from dogs and red wine.
My family room is a very high-traffic area. It’s the pass-through between the garage (our primary entry point) and the kitchen (the heart of the house). We were smart enough to tile the 20-square foot area inside the garage door as a drop zone for dirty shoes and snow boots.
Finding the Right Flooring
When planning the remodel of our family room in Fall 2018, my wife not only wanted to [once again] replace the carpet, but also eliminate that tiled area to make the room appear larger. Nearly every room in the house had its carpet removed to expose the original oak hardwood floors from 1970 when the house was built. But the family room shared a concrete slab with the garage. No hardwood under this carpet.
We tried a floating laminate floor in our kitchen around 15 years ago and hated it. Not only did you hear every click-click-click of the dog’s paws, it also showed every drip, drool and paw-print, and felt like we were walking on a Formica countertop. We happily replaced it with ceramic tile when we remodeled the kitchen shortly after paying off the laminate.
We definitely didn’t want laminate in the family room, and despite the fact we were installing a gas fireplace in this remodel, we felt tile would make the room feel colder. Ideally, my wife wanted hardwood.
I was working against a tight timeline to complete the remodel, primarily on weekends. I started the project in early November and wanted it done in time to hang our Christmas stockings on the chimney with care so Saint Nick could do his thing.
There were issues with putting hardwood in our family room. Given the timeline, my only choice would be a pre-finished, engineered wood floor. I couldn’t nail it to concrete; it would need to be glued. That would be more time, mess, and odor. Not ideal, but I was willing to do it if she wanted it. The main issue was liquid spills (and other doggy by-products) that sometimes aren’t discovered until the next morning. They can easily be absorbed into a wood floor causing permanent stains, de-lamination and odors.

Lifeproof Vinyl Plank Flooring to the Rescue
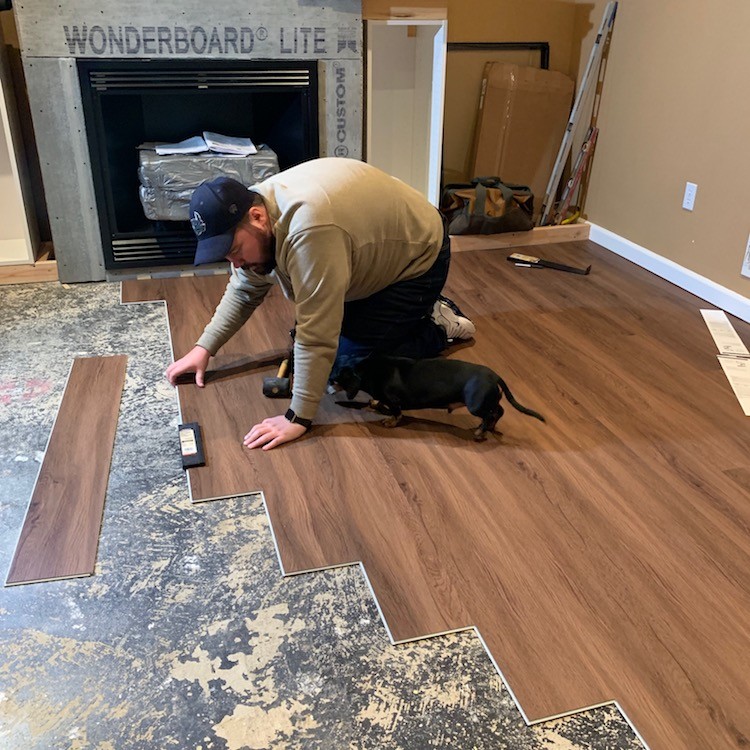
We wanted a flooring option that resembled wood, was water resistant and could be purchased and installed quickly. Our investigation led us to The Home Depot and their Lifeproof Luxury Vinyl Plank flooring. I then took on a DIY vinyl flooring install.
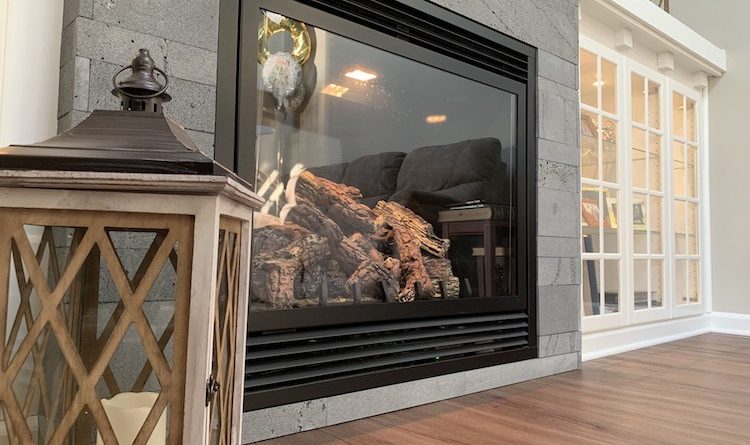
We found a plethora of samples in various species, colors and looks from clean to rustic. A quick first pass yielded at least six options that we liked. That list was whittled down to two, and the final decision was made with the style that was in stock. We decided on Shadow Hickory because of its clean lines, subtle grain, and warm, reddish-brown hue. We knew it would coordinate well with the furniture that was ordered in September as well as the fireplace stone and our paint palette.

I used The Home Depot’s online estimator and bought the recommended number of boxes plus a tapping block and pull bar. The estimator will account for waste, but a simple room like mine will have very little waste.

This was my first time taking on a luxury vinyl plank flooring install and I would definitely do it again. My 300-square-foot room was easily completed in a day, and I had two unopened boxes leftover. Better to have too much than not enough, and The Home Depot gave me a refund without any issue.
You can watch my detailed vinyl plank flooring install video at http://handydad.tv/lpfi.
Project Observations and Recommendations
- Take your time to determine the layout before you get started.
- Make sure all your flooring boxes are from the same lot.

- Buy a tapping block and pull bar with the flooring. Don’t cheap out thinking you can do it without them.

- Knee pads are a must, regardless of your age.
- A 2-person team works best: installer (kneeling) and helper (standing) to hand you the planks.

- Have 3 boxes open and randomly select planks.

- Stagger your seams by cutting the first piece in a row to a random length that is at least 8″ different than the last two rows.


Whether your house has kids with red juice, adults with red wine or dogs with their messes, consider Lifeproof Luxury Vinyl Planks for a beautiful floor that is easy to install yourself.
The post DIY Vinyl Plank Flooring Install appeared first on The Home Depot Blog.


No Responses Yet