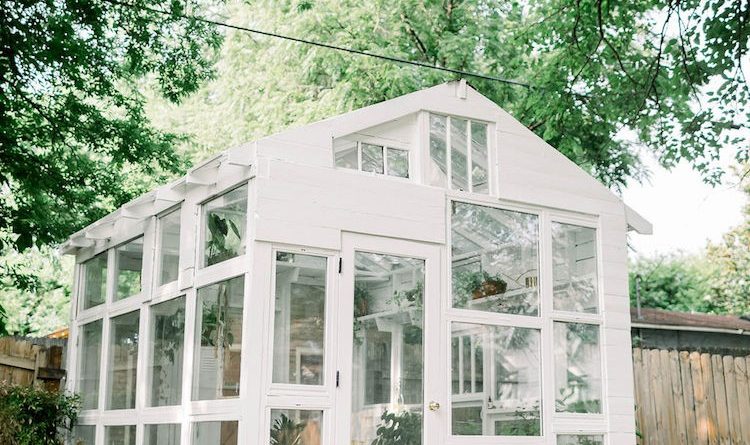
Before & After: A Beautiful Backyard Greenhouse

Hi there! I’m Andi and I live in Nashville with my husband, Eric, our one-year-old daughter, Lucy and our dog, Jack! We bought our 100 year old house last fall (you can find more photos here) and over the past few months have been making updates and improvements to make our house really feel like a home. Our biggest project has been turning our falling-apart garage into a functional, beautiful greenhouse.
Today, I’m going to share some before and after photos and walk you through our greenhouse building process. My husband planned and built the entire structure. Hopefully you will get inspired by our project and learn some tips, in case you want to build you own!


Step 1: Out with the old!
For our greenhouse project, we started by tearing down the existing structure. Grab a pair of work gloves and a sledge hammer and start swinging! Start with any siding, windows or doors making sure to leave the frame intact. Once you are down to the studs, use a jigsaw with a wood and nail blade to cut out the wall and knock down!
After the first side of the garage was knocked out, he was able to push over the structure due to all the rot. We highly recommend getting help from a friend for this part of the process. And testing the structure along the way so it won’t collapse on you!


Step 2: Clean-up!
Haul away all the debris. We got rid of a lot of debris. But ended up saving some of the garage siding, a couple of old doors, and windows that we integrated into the final greenhouse. We also found some really old license plates (from the 1920s!) in our garage and saved those to clean up and display in the greenhouse.

Step 3: Collect old windows.
Thankfully our neighborhood of East Nashville has so many renovations happening all over that this was not a challenge. We collected windows from five different houses in the area to get all the windows we needed. We love how unique they all are! Facebook marketplace, garage sales, estate sales and auctions are other great places to pick up windows.


Step 4: Plan the frame.
Using old windows means you will have a super unique framing throughout the building. We laid out the old windows like a puzzle and spaced 2x4s of various lengths in between to get to four mostly glass sides for our 10×14’ greenhouse.
Here are a few tips and tricks to keep in mind during the planning phase. Collect all the windows you plan upfront, and then plan out the full structure with detailed drawings. Make sure to buy pressure treated lumber for this outdoor structure. We also were recommended by an avid gardener friend to make sure we had a fan for air circulation in the greenhouse. We bought a solar powered attic fan and installed it into the back wall of the greenhouse.


Step 5: Build the roof.
The easiest greenhouse roof covering is the corrugated plastic that you can attach to the rafters. Instead, we collected so many recycled windows that we ended up doing the roof in glass. We have so much respect for builders and Eric’s high school geometry teacher. This part is NOT easy! We have so much respect for builders and high school geometry teachers! Start with a long ridge board (2×6) and attach your rafters with birdsmouths cut out on either side to support.
Similar to building the frame, plan out window placement on the ground to size where your rafters should be making sure that the rafters supported by the top beams on the structure all the way to the ground. Attach the rafters using hurricane ties to the frame and frame in the windows. Fill in the gaps with a silicon sealant and use white asphalt roof panels along the ridge beam.


Step 6: Freshen up the area around the greenhouse.
The area around the greenhouse was pretty ‘blah’ so we decided to freshen up the area around the structure. We opted to work with a local contractor to build a deck on the front of the greenhouse. The deck gives the greenhouse a nice entrance, and covers the existing concrete slab that the greenhouse was built on top of. My mom also graciously planted a bunch of plants and flowers around the greenhouse, which really brightened up the overall look and feel of the greenhouse area.


Step 7: Get painting!
The most exciting step of the greenhouse project was one of the finishing touches – painting! We opted for Behr Premium Plus Ultra Exterior Paint in Whisper White for the entire interior and exterior of the greenhouse and LOVE the way it looks! Painting the entire structure one color really helped make the greenhouse look more finished and refined.

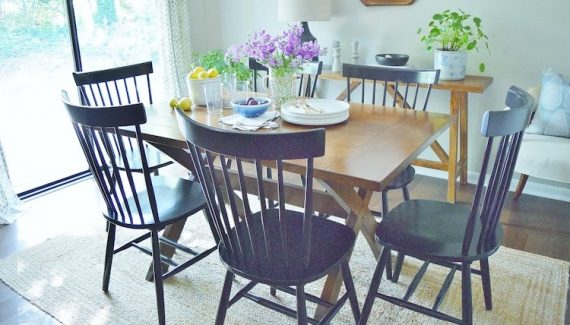
Step 8: Buy plants!
We are still working on adding more plants to the greenhouse, but we have a good start. If you’re looking for dangly plants (which look great hanging over the edge of a shelf), you can’t go wrong with golden pothos or english ivy.


Thanks for reading! You can follow our adventures at luckyandi.co and find lots more greenhouse photos on my Instagram @luckyandi.
Additional photo support by Laura Moll.
The post Before & After: A Beautiful Backyard Greenhouse appeared first on The Home Depot Blog.

No Responses Yet