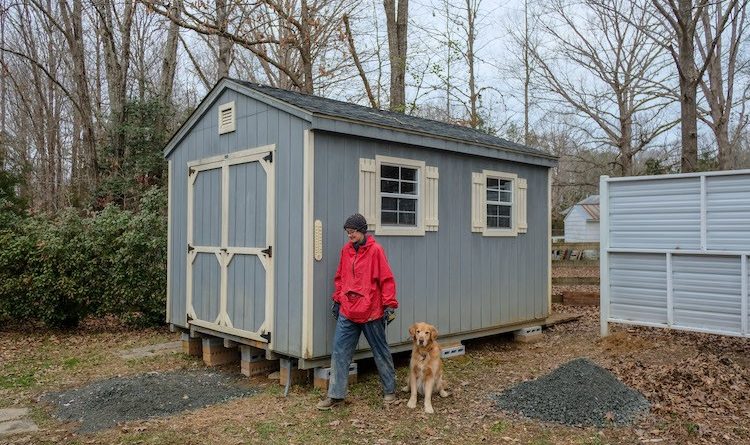
Darbin Orvar transformed their shed into a workshop. One of the first, and key, steps to turning a shed into a workshop is to tackle the insulation process. Read the blog to see how Darbin Orvar tackled the shed insulation process.
Insulating Floor Joists in a Crawl Space – Turning a Shed into a Workshop
Materials
- Rigid Foam Boards
- Fiberglass Insulation
- Construction Adhesive
- Caulk Gun
- Spray Foam Insulation
- 16 gauge 2 in Finish Nails
Tools
Accessories
Shed Insulation Tutorial
There’s a small shed on our property: a basic, prefab structure that measures 10 x 14 ft. I wanted to finish it and turn it into a workshop. It needed a lot of work, and one of the first things to tackle first was shed insulation. While you could focus on just doing the walls and the ceiling, you’d leave a lot to be desired if you didn’t tackle the floor. Of course, this job is rather dirty and a bit unpleasant – however it’s certainly doable, and it should go a long way towards making this little shed more comfortable and cut down on my energy bills once I start heating and cooling the space.
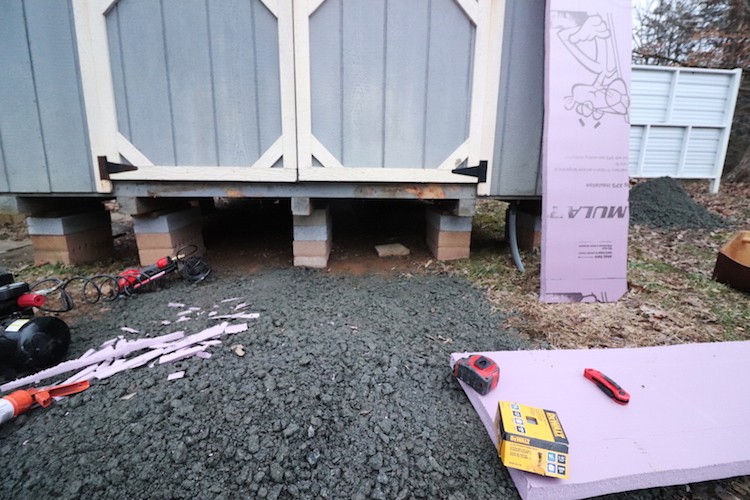
Before starting this job, I jacked the shed up a couple of inches using a car jack and raised it with some additional concrete blocks, because it was contacting the ground a little too closely. This gave me a small, but manageable crawlspace to work from. My plan was to attach the shed insulation between the joists, and I was hoping the space was big enough for me to fit under in order to get the job done. I also used a leaf blower to remove dirt and debris under the house to get it nice and clean.

Step 1: Picking up Supplies
I began by visiting my local Home Depot store and checked over the various insulation options. For the walls and ceiling, I picked up some fiberglass insulation. However, for the floor, I purchased rigid foam insulation. Since this will be exposed directly to the elements, you want to make sure you pick a material that isn’t going to mold over time. I decided on 1 ½ in. Owens Corning Rigid Foam which comes in 4×8 sheets.
Step 2: Cutting Sheets to Size
I picked up four sheets to cover my 140-sq. ft. shed, and began by cutting the sheets into smaller sections, using a jigsaw. The floor joists were 16 in. on center, which meant I had a space of 14 1/2 in. in between the joists. Cutting the pieces to 14 in. turned out to be a good measurement.
Step 3: Preparations
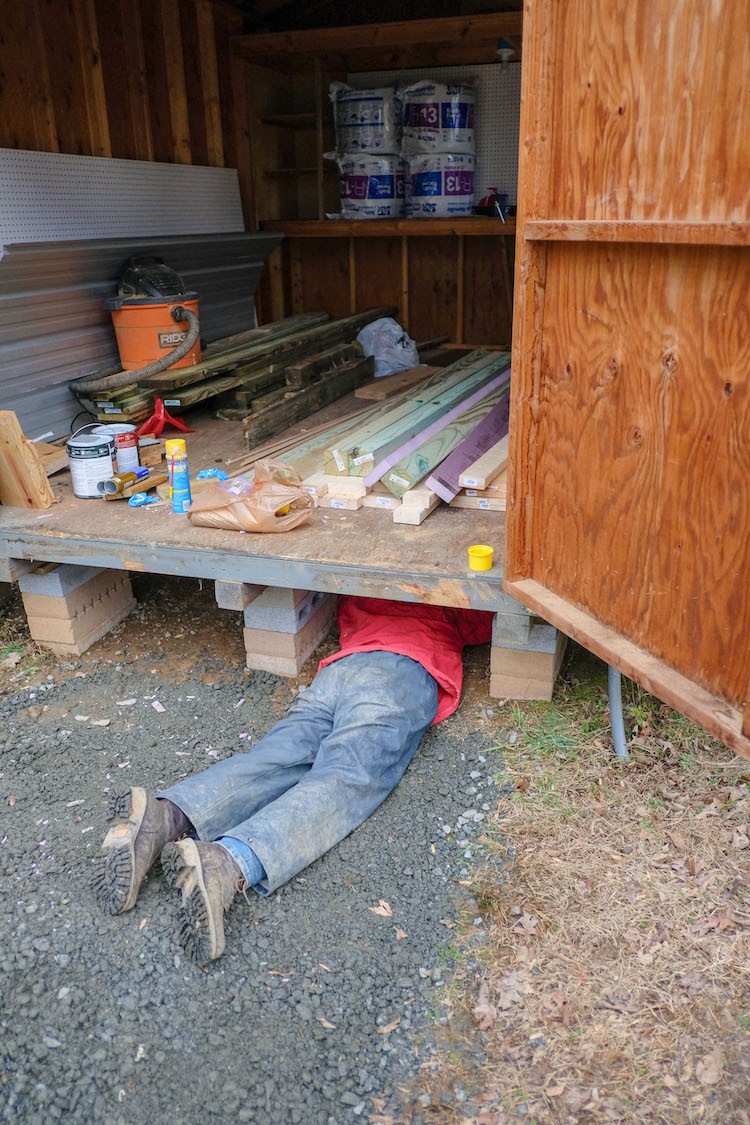
To secure the shed insulation, I used two methods: construction adhesive as well as 2 in. long 16 gauge nails in a nail gun hooked up to a compressor. In order to fit the pieces in they need to be cut into smaller sections. I found that 31 in. worked well for my shed. Equipped with nylon rain pants and jacket, hat, gloves and glasses I was ready to crawl under the house to get started, and I would highly recommend wearing something similar, too, so you’re at least somewhat protected.
It’s a good idea to do as much preparation ahead of time as possible: cut several boards to size, apply construction adhesive, position them strategically so you can reach them once you’re under the house. Charge up the compressor and make sure there’s plenty of nails in the nail gun.
Step 4: Securing the boards
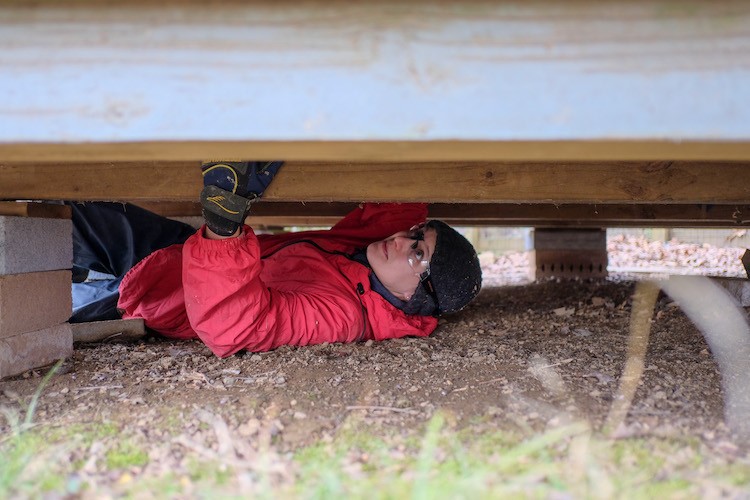
Once you’ve prepared several boards, go under the house and secure one board after another. Crawling under a shed can be a little claustrophobic, so take it easy and do one step at a time. Wearing glasses is certainly important, as you get a lot of dirt falling down on your head as you’re moving the boards around, touching the joists and the bottom of the plywood.

Step 5: Fill in small gaps
The final step was to use some spray foam insulation in between any gaps or spaces, and this tightened everything up quite a bit.
Overall, I think the shed insulation process went quite well, and if you’re debating whether this is a doable project, I would say – go for it. While initially a bit unpleasant, you get over that pretty quickly, and the benefits of a more insulated house are pretty great. Next I’m ready to tackle the walls and the ceiling, and this time, it should be a lot easier!
The post DIY Shed Insulation Tutorial appeared first on The Home Depot Blog.

No Responses Yet