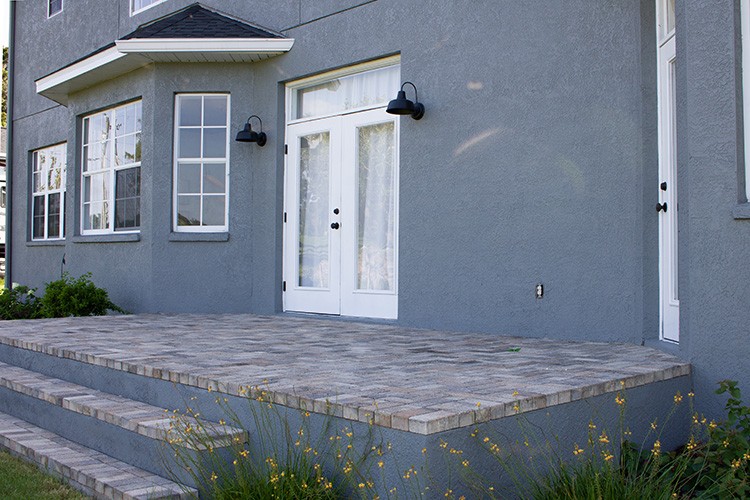
I’m going to just come right out and say it, our back porch has been neglected. Sure, I purchased some chairs a couple years back, but that’s about it. The last few years have not been kind to said rocking chairs and they are in pretty sad condition. If I am being completely honest, I just haven’t been very motivated. Living in Florida has made me hesitant to give this area a facelift. I didn’t want all my hard work to be destroyed by the Florida heat. Have you ever experienced this fear too? Well, I am happy to report that I have found the answer. The best thing you can do to protect your wood projects is by staining and sealing, and Olympic Stain has just the products you need to do this all in one step!

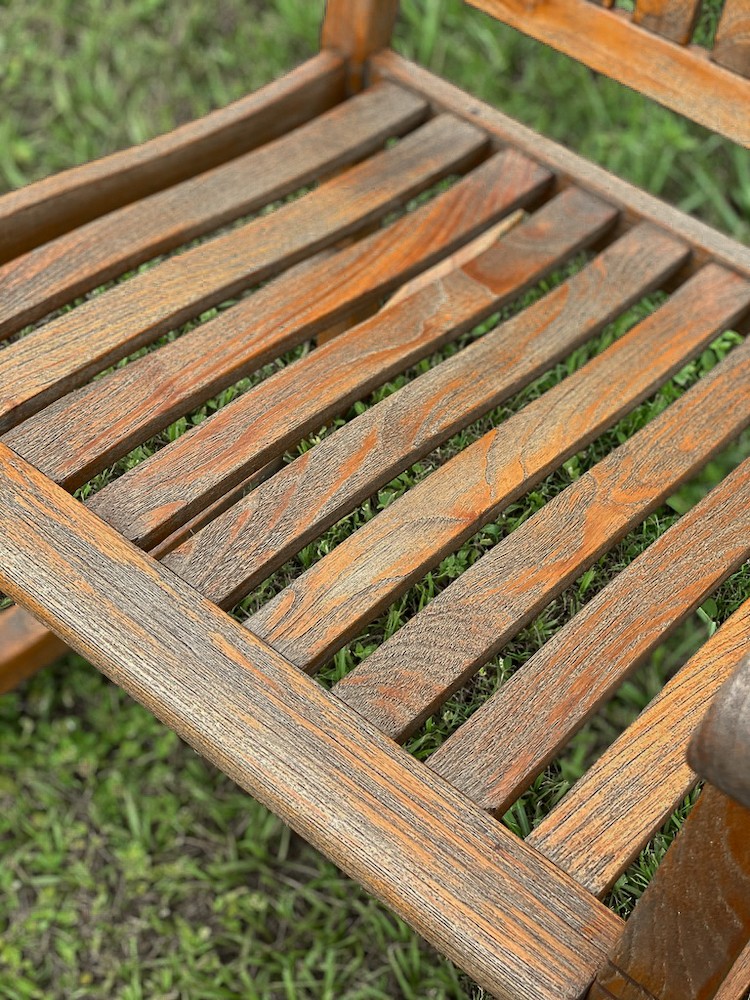
So let’s get started. Remember those chairs I mentioned? Well, I was actually about to throw in the towel and give up hope on them. I have power washed and sealed these chairs (not with Olympic Stain) multiple times only to find them looking old and cruddy in just a few weeks. It was so frustrating! That song and dance was getting old, so I thought I would try a different approach.
Step 1: Clean Surfaces
In the past, power washing and sanding these chairs took me several days to complete. It was an arduous task and I was not willing to do it again. After a little bit of research and reading reviews, I found something that looked promising. Olympic has a product (Deck Cleaner) specifically made for cleaning outdoor wood projects in preparation to be stained and sealed. Heck, I had tried everything else might as well, right?
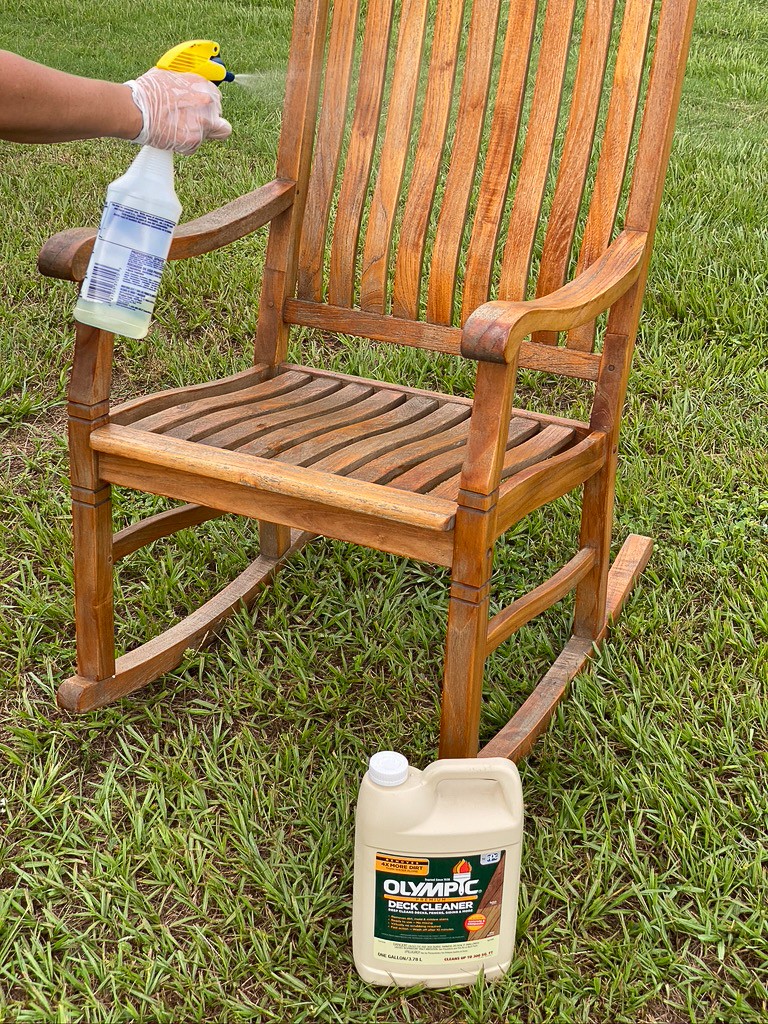
Best decision ever! It was the easiest 15-minute project ever. All I needed was a gallon of Olympic Deck Cleaner (about $10) and a plastic spray bottle. If you are doing a large area I would recommend using a 1-Gallon Pump Sprayer. After reading the directions carefully and following the safety precautions, I started spritzing down my first chair. That’s it, you heard that right. All you have to do is spray it on and wait 5-10 minutes. Boom, done.
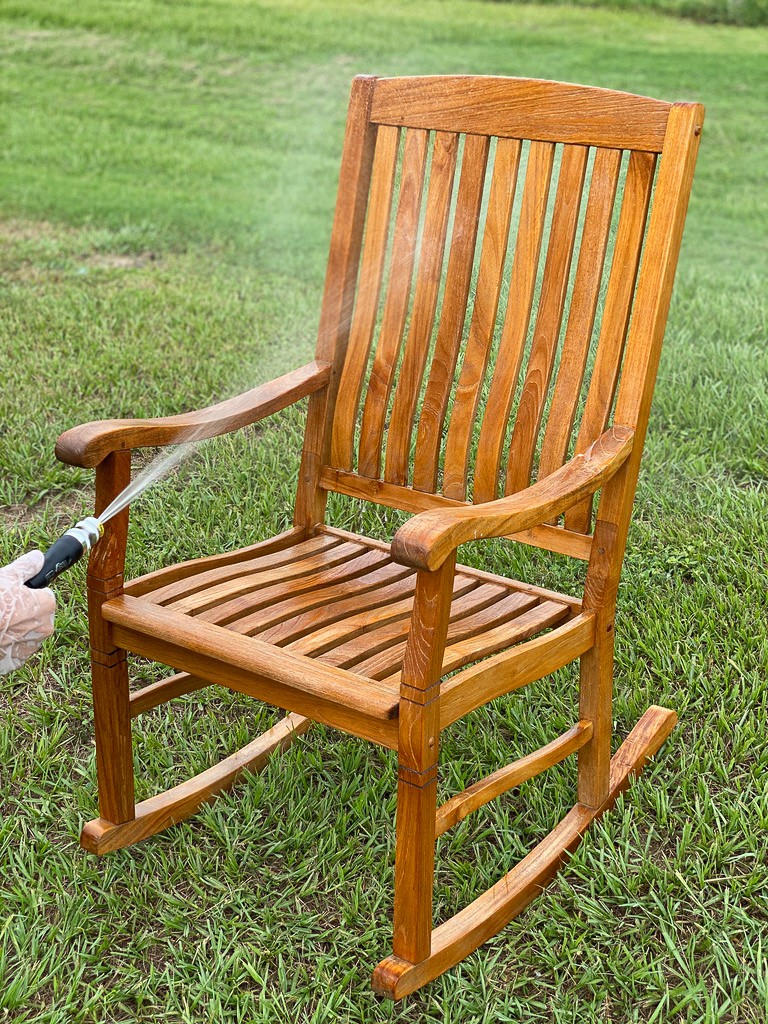
I set a timer for ten minutes and watched a miracle happen. All of the sun damage and mildew infested grain vanished. No need to scrub, it was just gone! Once the ten minutes was up, I grabbed the garden hose and thoroughly rinsed the chair down.
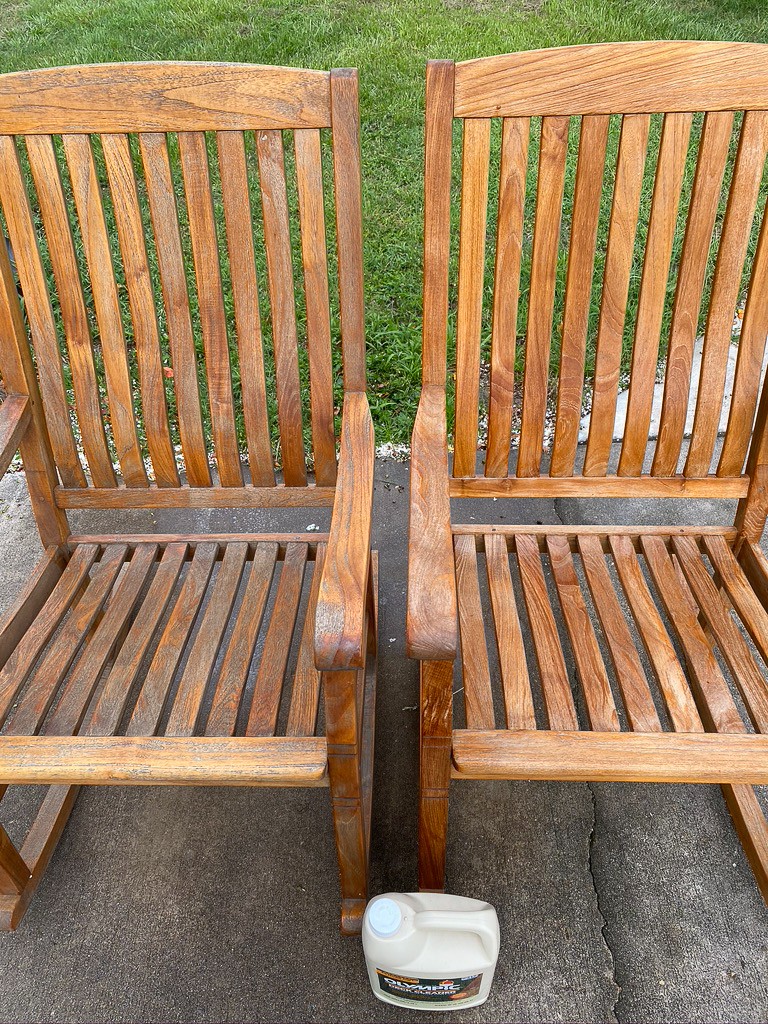
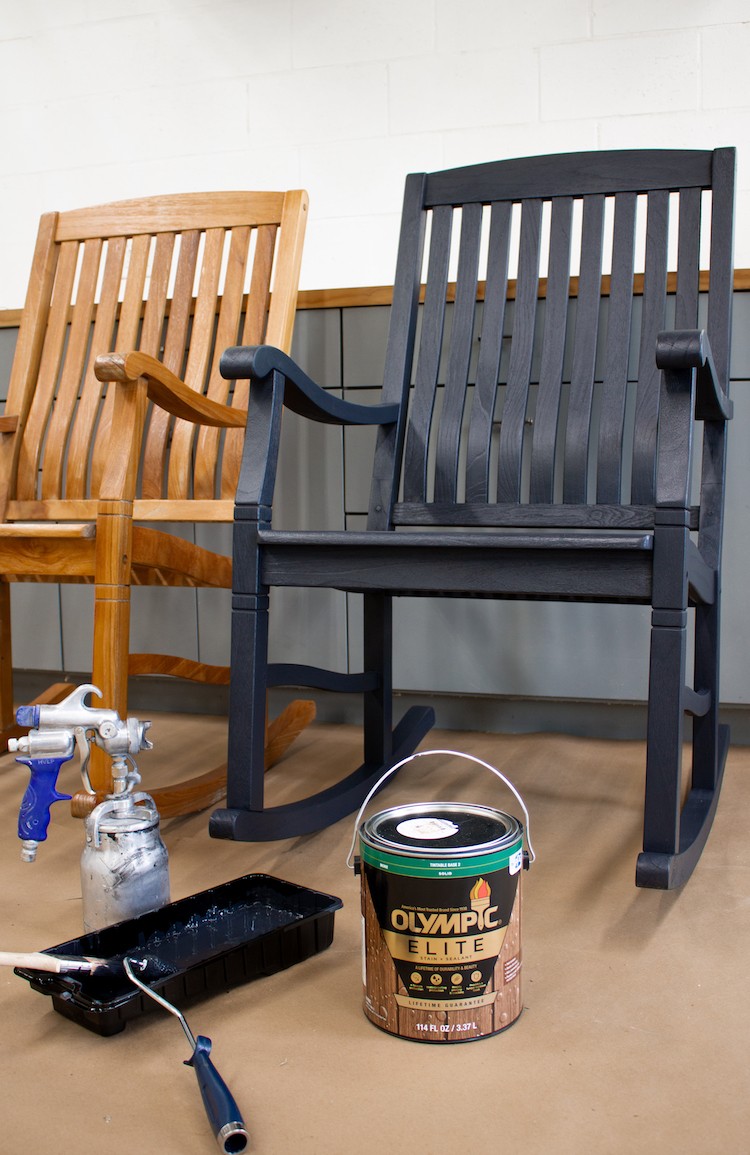
Take a good look at this before (left) and after (right). All of the weathering and mildew are gone. It had stripped the chair down enough that it was ready to receive a new stain and sealant.
Step 2: Stain and Seal
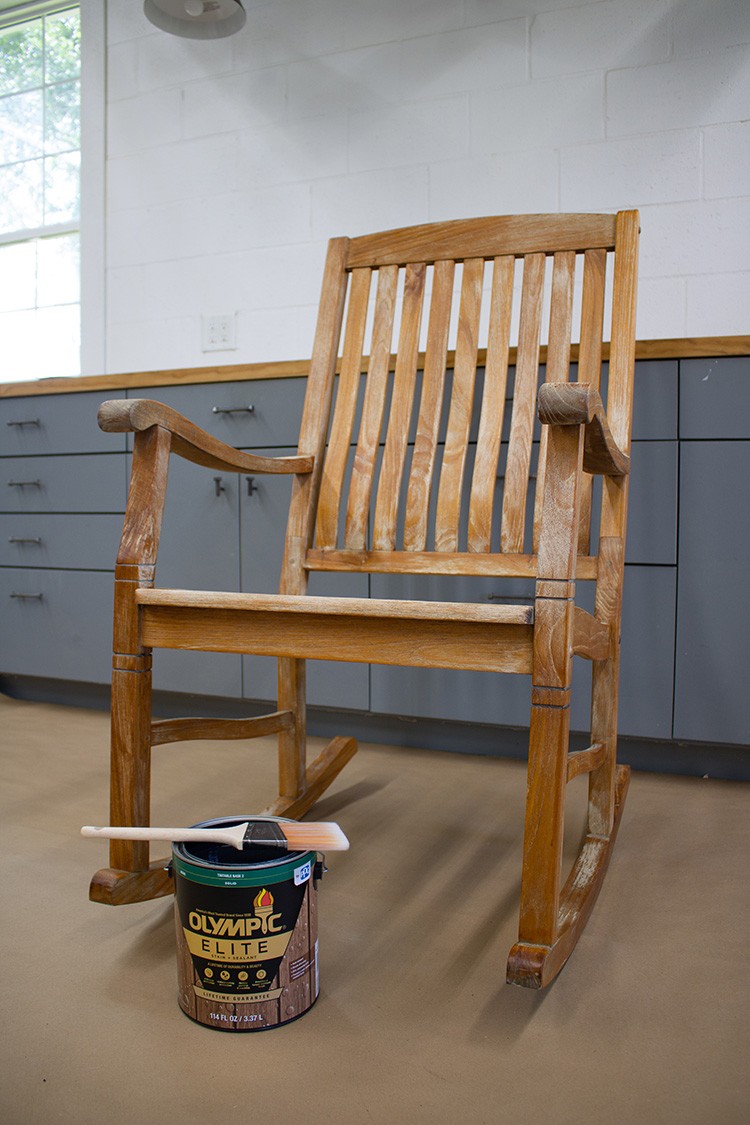
It’s time to give these chairs a new life. While I like the natural wood tone, I have a vision for this back patio makeover, and it requires something a little moodier. I knew I needed something that would stain as well as seal, and I definitely wanted something that was opaquer than a traditional stain. After doing my research I found that Olympic Elite Solid actually has a ton of color options. They have quite a few samples in store, and there are even more options online. I opted for “Ebony” which is a yummy dark charcoal gray. I went to my local Home Depot paint department and they mixed it right up.

After letting my chairs dry completely, I started applying my Olympic Elite Solid Stain. I don’t want to oversell this, but this stuff goes on super smooth with perfect coverage!
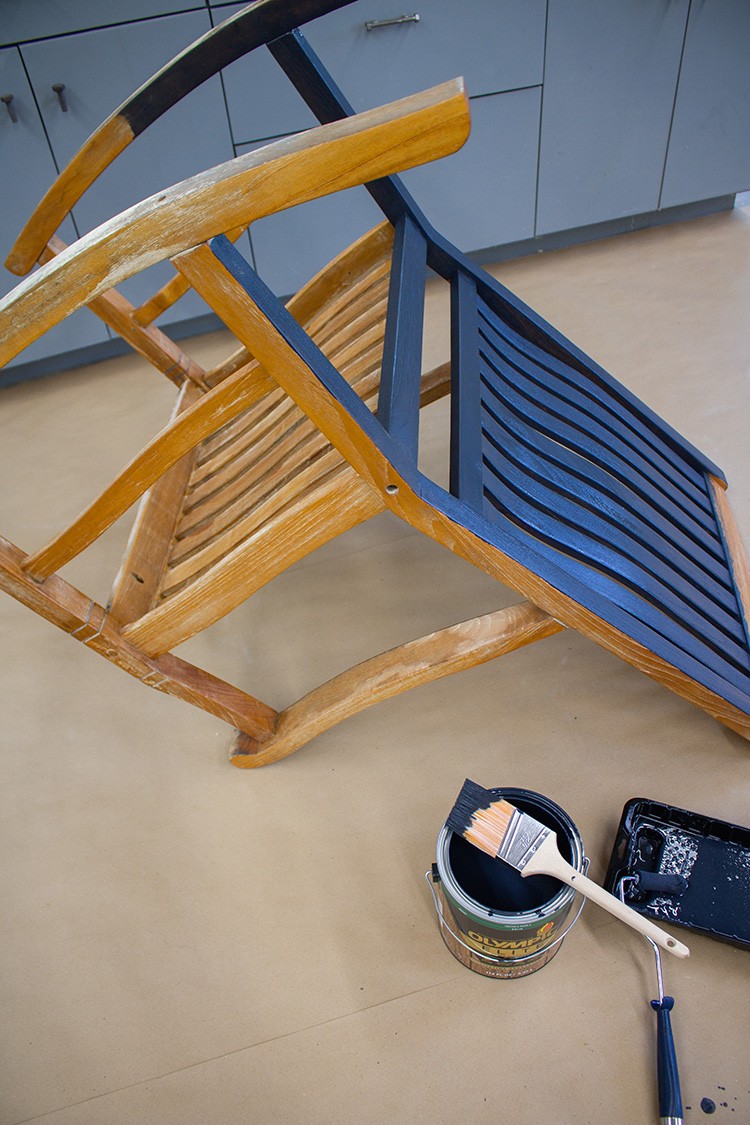
Olympic Elite Solid completely surpassed my expectations. In my limited experience with stain/sealants, they have always been messy, runny and required multiple coats. Not this stuff! I was having great success using a paint brush in the corners and rolling the slats, but then I thought I would try and speed up the process.
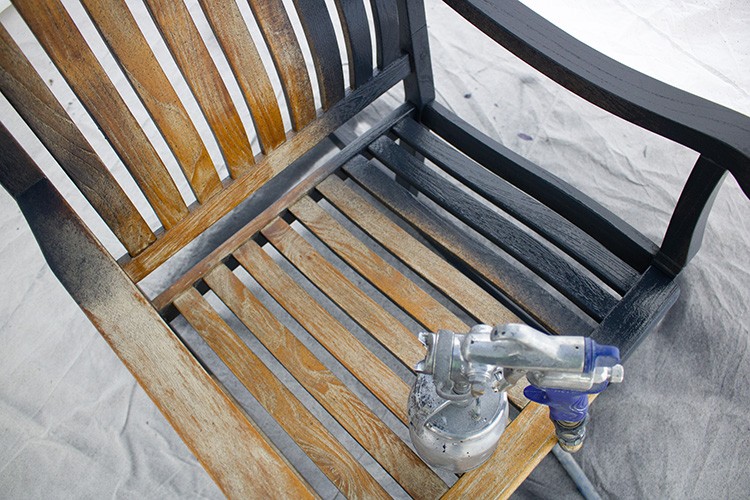
I loaded up my paint sprayer with the new “Ebony” color and it went on like butter! In a matter of minutes, I had brand new looking chairs with pristine coverage. Color me impressed.

Step 3: Allow Stain to Dry and Design
I set to work with renewed faith in outdoor furniture. So much so that I decided this patio needed a little bit of interest on the back wall.
I wanted to tie in the beautiful deep Olympic “Ebony” color of my chairs, but I also wanted a bit of contrast and some warmth that wood tones would bring, and I had a great idea.
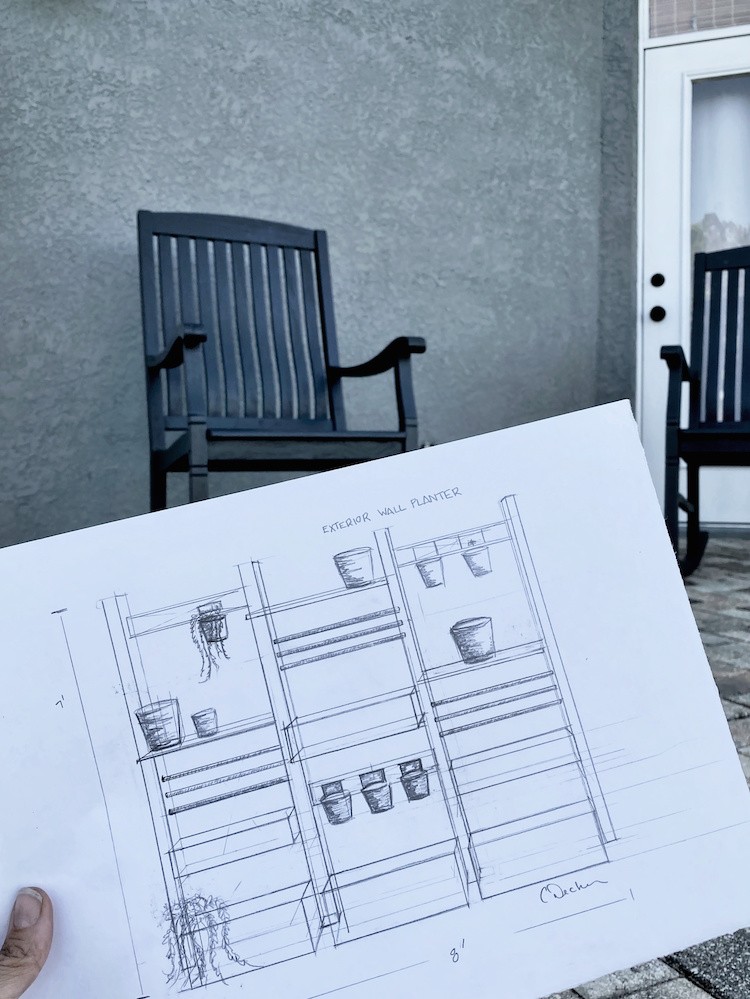
Just like my hesitancy with staining chairs, I used to have a fear of building outdoor furniture. While there are some woods that have natural/chemical preservatives, they tend to be fairly expensive. On the other hand, a more affordable common board isn’t typically thought of for outdoor use, until now!
Olympic Elite Stain and Sealer allows the best of both worlds. It allows for the use of cost-effective materials with the added protection wood needs to stay looking its best. Feel free to use whatever building material you prefer with full confidence it will stay looking incredible.
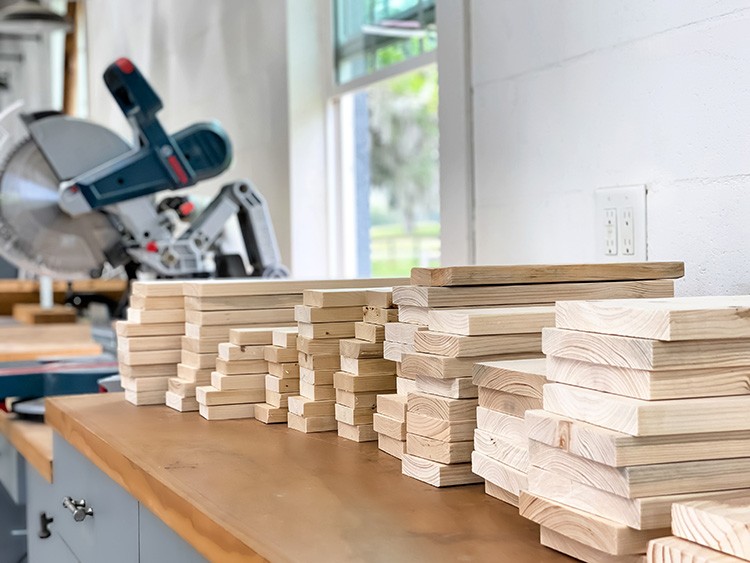
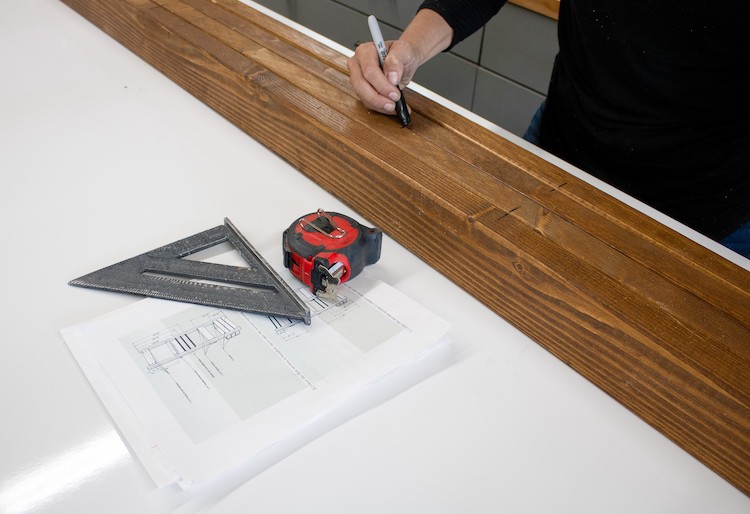
Step 4: Prep Materials
Using a miter saw I cut all my boards needed for the build, and then used a sander to achieve a nice smooth finish.
Shop online or head to your nearest Home Depot and pick out your favorite color selection from the Olympic Elite collection. The Olympic Elite collection contains “color rich technology” and “All-Climate” protection. What does that mean for you? That means a one-step finish that will penetrate leaving a rich color and protect your project from all the outdoor elements.
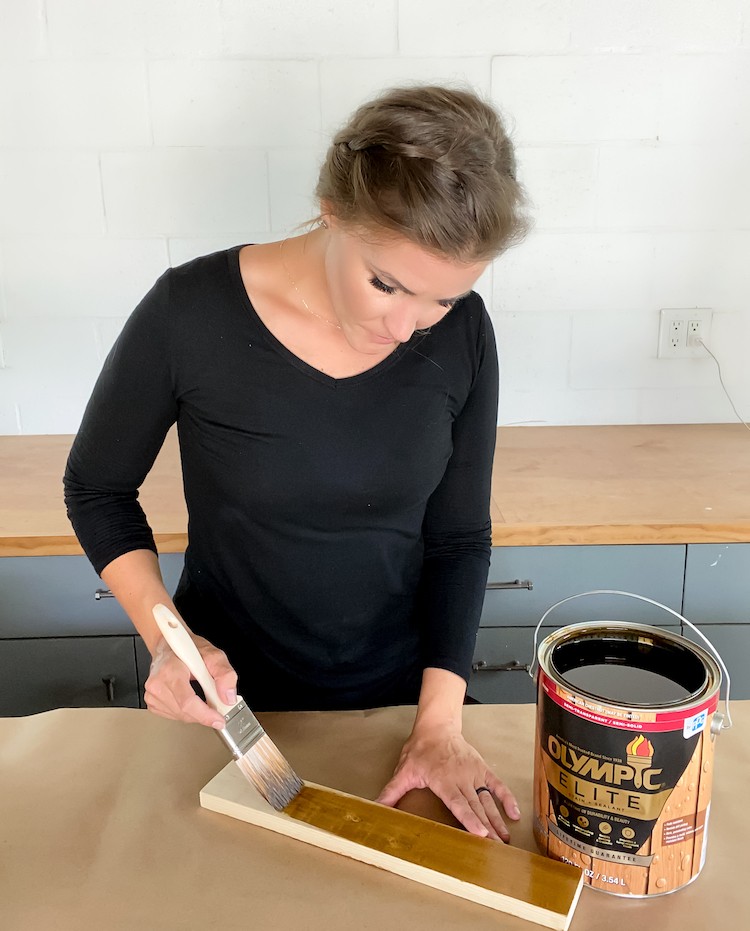
When building a project designed for the outdoors, I prefer to apply my Olympic Elite Stain/Sealer before assembling. This will ensure that all parts of the board are properly protected. Olympic Elite Stain is very easy to work with, it can easily be applied with a brush, roller or sprayer. Just make sure you are working in a well-ventilated area.
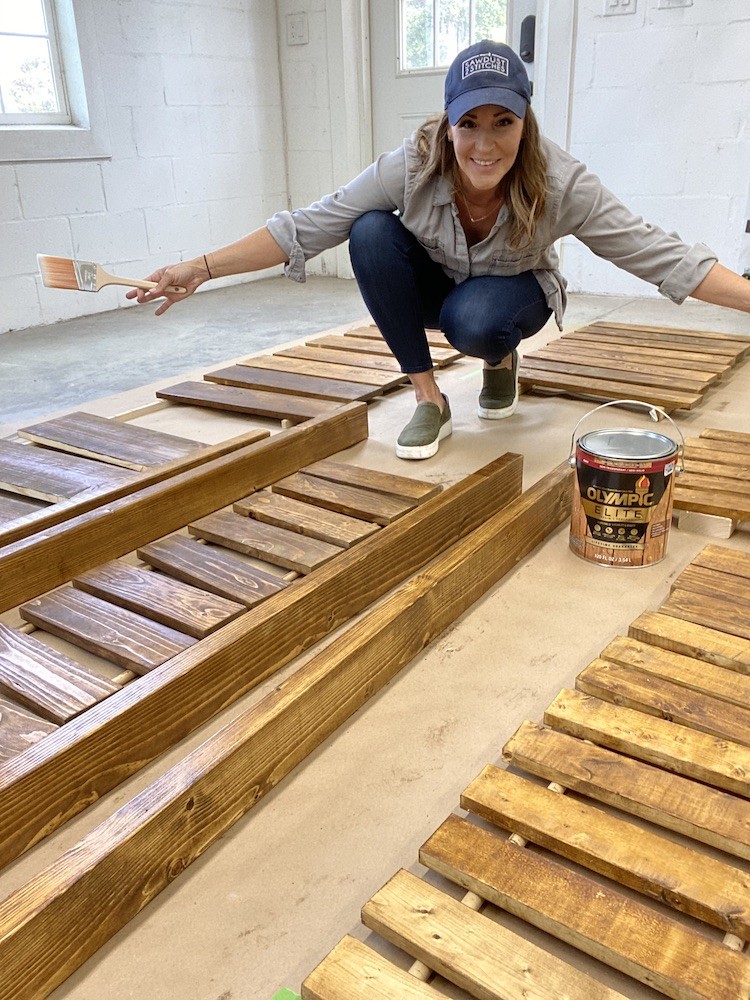
Step 5: Build Components
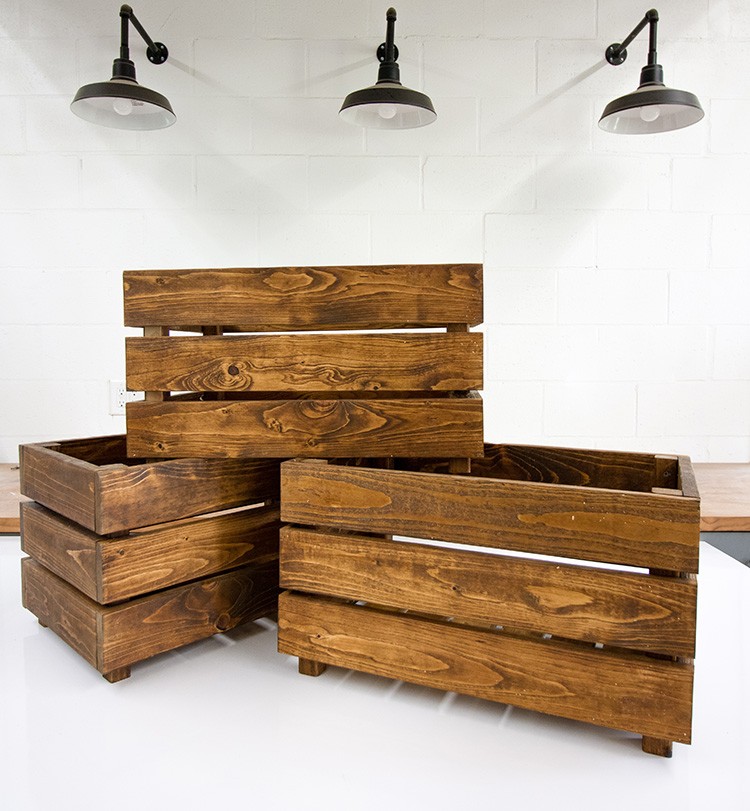
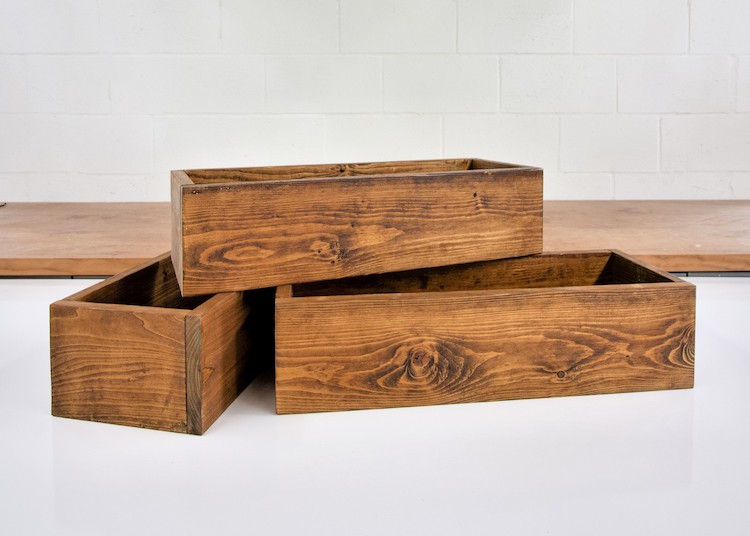
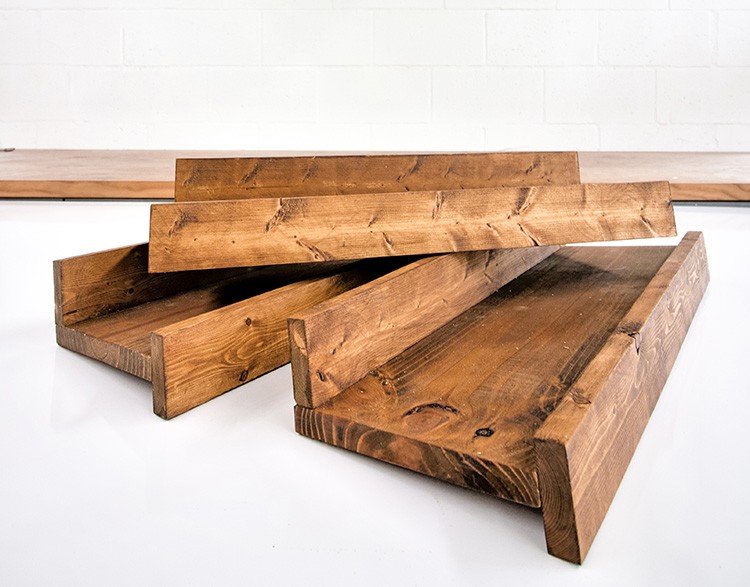
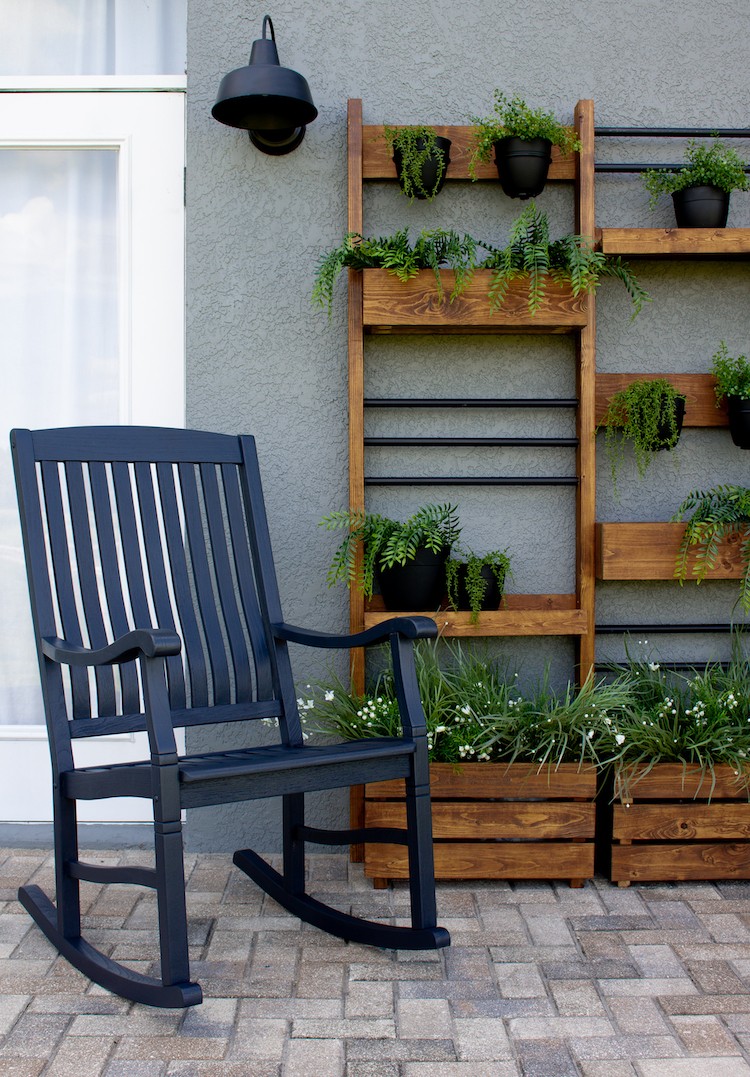
This is a simple build that is essentially three basic builds; a large crate, a small planter box, and a simple shelf. Each of these builds are repeated three times.
The last element needed are the plant ring mounts. I used six 6-inch Vigoro Planter Rings for this design and I love them. The contrast of the matte black against the Olympic Elite “American Chestnut” makes my heart skip a beat.

Step 6: Posts & Assembly
We are so close to finishing up this final project for the patio refresh. All that is needed now is to install the above assembled components to four posts. Before getting “gung-ho” I recommend taking a few extra minutes to mark the back of the four posts with the desired dimensions for crate, planter, ledge, ring mounts and rods.
When assembling start with one side of the structure and work your way across.
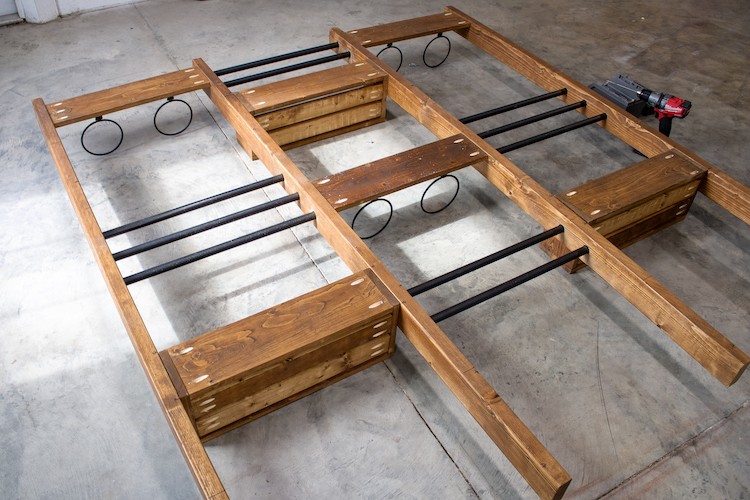
Once all of the bars, planter boxes, ledges, and ring mounts are installed, flip the entire unit over and fasten the large crates to the base the posts.
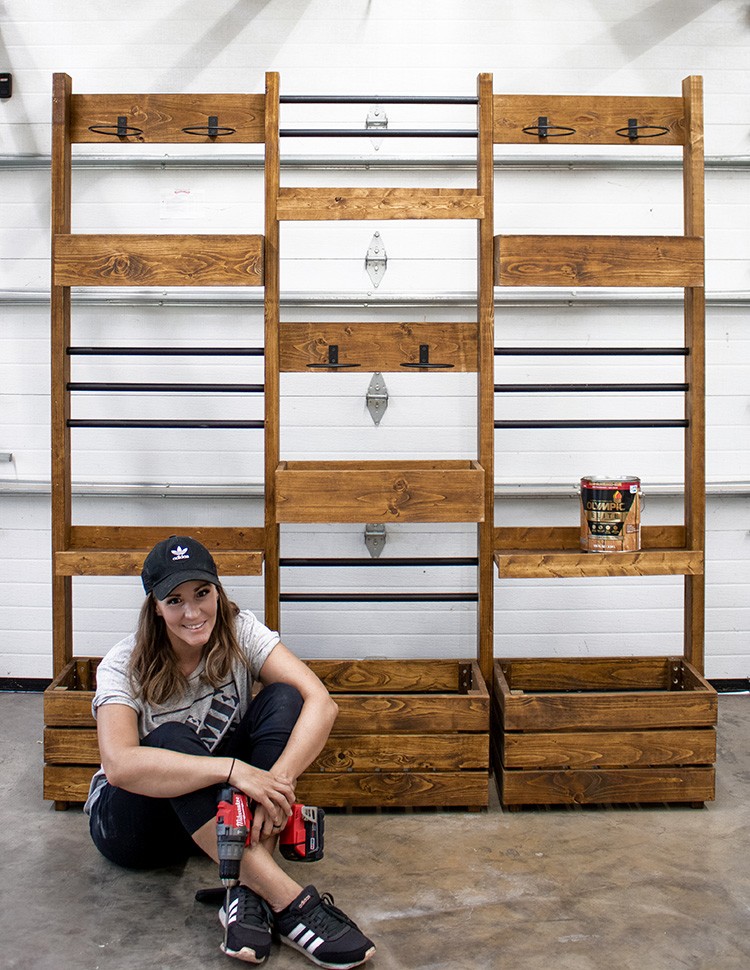
Step 7: Bring It All Together
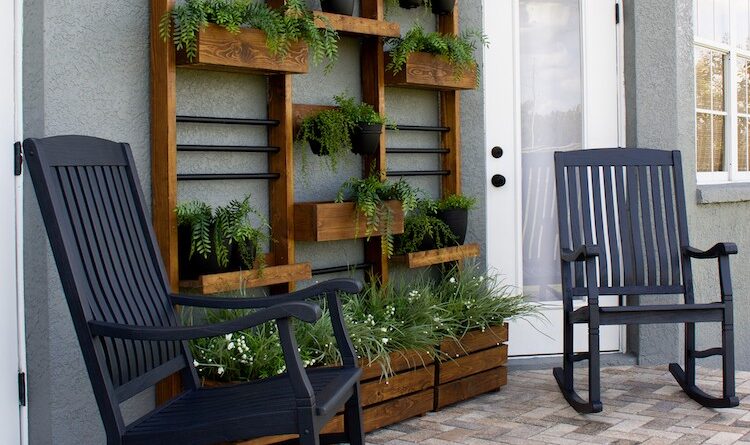
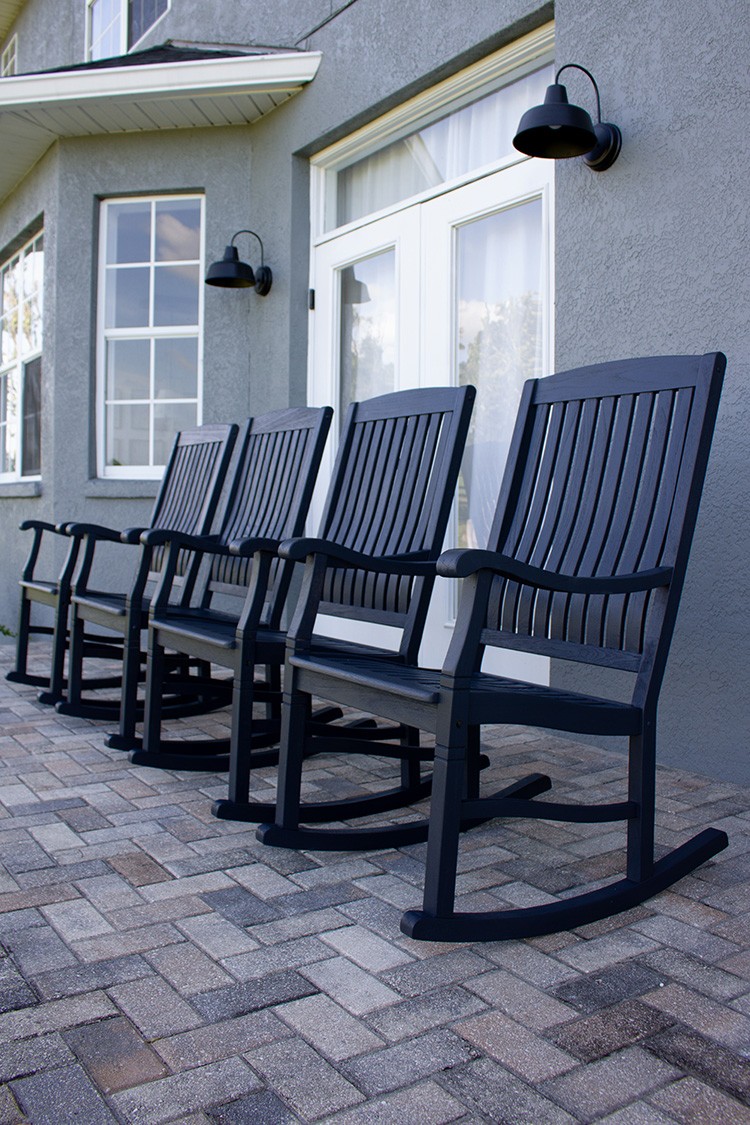
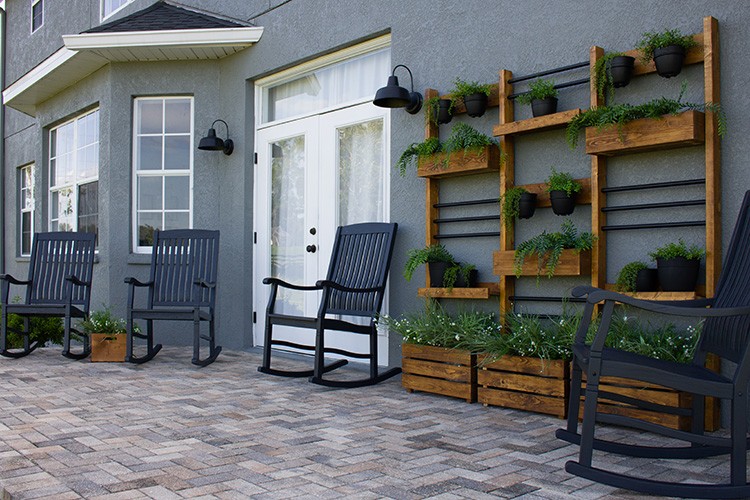
It’s now the moment we have all been waiting for, it’s time to bring this whole plan together and give new life to this otherwise plain back patio.
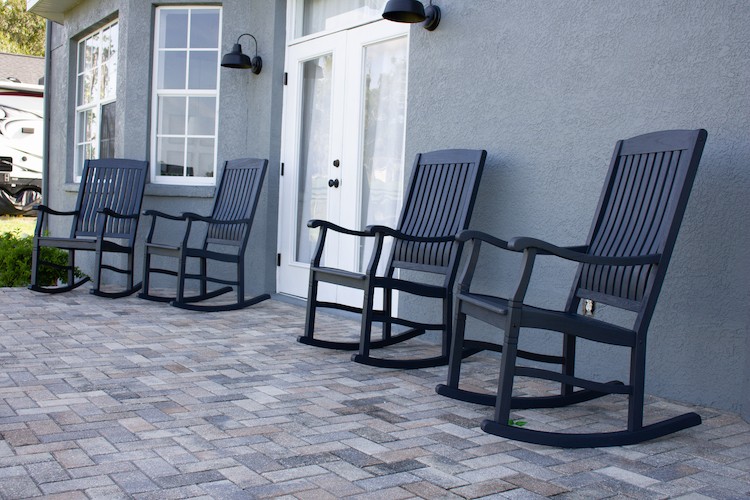
Just look at how welcoming this back patio is now. Don’t you just love the rich dark “Ebony” color of the newly refinished rocking chairs?
What about that beautiful wood grain popping through the warm stain color accented with the pops of black that unify the whole space? Doesn’t it just warm your heart? I am thrilled with the outcome and the new knowledge I have on the proper way to tackle outdoor projects. All-in-all I will call this back patio refresh an unmitigated success.
The post Patio Refresh with Olympic Stain appeared first on The Home Depot Blog.

No Responses Yet