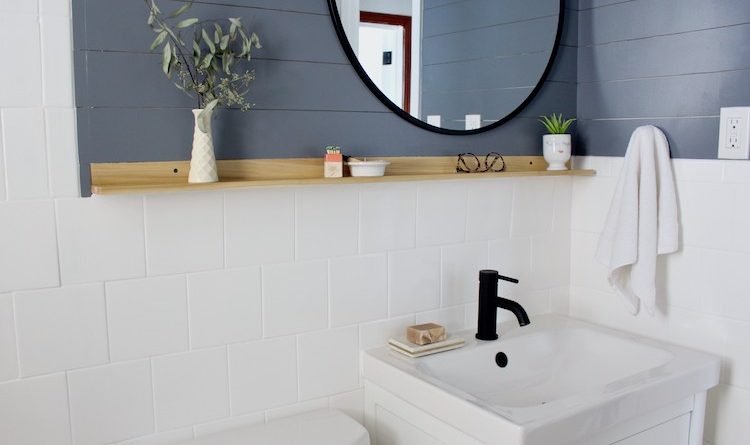

Did you know that you can paint your bathroom tile? You sure can, and it’s a game changer. My husband and I recently gave our home’s tiny bathroom a makeover that feels bright, fresh, and inviting, all with the help of Rust-Oleum’s Tub & Tile Refreshing Kit.


When we moved into our home almost three years ago, the bathroom was very… orange, and not exactly our style. Between the beige wall tile, tan floors, and peachy paint, the room was so bright But in the worst way. It was finally time to give this space an upgrade, but we wanted to keep the makeover easy and inexpensive. After learning about the Rust-Oleum Tub & Tile Refreshing Kit, we decided to give it a try. We are so pleased with the results. The finished product looks great and actually feels like regular porcelain tile. It’s a great option for updating your bathroom without needing to completely demo and renovate your space.
How to use the Rust-Oleum Tub & Tile Refreshing Kit
The key to successfully using the Rust-Oleum Tub & Tile Refreshing Kit is closely following the instructions provided on the product. While it’s definitely a bit of prep work, it’s important to ensuring your finished product looks great. Primarily, you will be removing or taping off all of your fixtures and faucets. Remove all caulk and silicone from your tub (and sink if necessary) making sure that your tile is super clean.


The Rust-oleum Tub & Tile Refreshing Kit is an epoxy formula that comes with two cans – the base paint and the activator. Once they’re mixed, you need to use apply the paint within 6 hours or it will solidify in the can. The fumes are very strong, so make sure you have windows open, fans blowing, and wear a mask. We used foam brushes and rollers to apply the paint and they worked great. Fabric rollers may leave their fibers in the paint, so foam rollers are the way to go. We applied three coats on our tub and wall tile, using about four kits in total. While the epoxy is thinner than your standard interior wall paint, it covers super well. There’s no hint of beige under this new white tile!


After the paint had dried and had 3 days to cure, we applied new silicone and caulk around our tub and glass block windows. We installed a new matte black Delta showerhead, tub spout, and levers from Home Depot. We love the way the black pops against the white tile and it’s a huge upgrade from our old fixtures. In the window opening we built a three-tier shelf out of copper pipes and pine boards. This to better utilize this space in the shower (and we of course added some cute plants!)


Above our wall tile, we had initially painted our walls white, but to add some texture and color we installed a plank wall using sheets of MDF, painted with BEHR Premium Plus in Liquid Mercury from The Home Depot. We gave the floor a much-needed refresher, too. We used regular interior wall paint to add a geometric pattern to the existing floor tiles. Then we coated it with a clear sealer to keep things protected. It’s a fun pop of color against the new white tile and is holding up great.


For some finishing touches we installed a new vanity and sink with a matte black Kingston Brass faucet from The Home Depot and black and brass hardware. Above the sink we built a shelf from poplar boards we found at Home Depot – it’s the perfect place to add some personal touches and decor to the space. We brought in additional black and brass with the round mirror and handmade light fixture – we love how they look against the plank wall.

To finish out our bathroom makeover, we installed a new door and gave it the same trim treatment we used in our DIY Mid-Century Door Makeover post. We’re so thrilled with how this space turned out. Before taking on this makeover, we didn’t know painting our tile would even be possible, but we’re definitely glad it is. Isn’t it amazing what a little paint can do?
The post Small Bathroom Makeover With Painted Tile And Painted Floors appeared first on The Home Depot Blog.


No Responses Yet